Quarantine has lead to some oddities to pass the time, and this post is no different. I created a Discord Bot in Rust, hosted on my Raspberry Pi. It's purpose? To shrug. This is the way 
Warning - this post is gonna get silly
What Are We Making?
A bot with a few different utilities baked into it, some practical and others more so for the fun of it. For this article, we'll talk about my experience using the Serenity-rs library to create a bot which will:
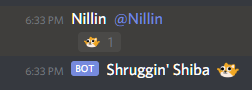
- React to a message that mentions a specific user name
- Send a custom emoji in response to the user
Some of the other dependencies we'll rely on:
- dotenv to help us have a test environment versus a production one.
- lazy_static for global singletons
Before the Code Came the Build
Sadly in order to we first need an instance to run. In short: A Raspberry Pi hosting a Docker container of our bot, with a separate env for testing and production. Let's unpack these.
1. Defining our Environments
Recall, I don't like manually changing values and neither should you! I want to quickly run something locally - futz with it - and have zero impact on the production running instance. For this, it means defining two bots in the Discord Application Portal - aptly named disbot and disbot-dev. I can then configure two .env files containing the following:
API_KEY=<Your Bot Token Here>
EMOTE_NAME=<your-emote-to-react-with || shrug_dog>
EMOTE_USERS=<csv-of-users-to-target-when-mentioned || User1,User2,User3>
Ideally we now set ourselves up to pass the desired env as a CLI arg, eg cargo run dev vs cargo run. Thanks to dotenv, this will be a relative breeze using a few helpers
- An
EnvironmentEnum, to vary app behavior such as debug logging
#[derive(Clone, Debug, PartialEq)]
pub enum Environment {
  PROD,
  DEV,
}

impl FromStr for Environment {
  type Err = String;
  fn from_str(s: &str) -> Result<Self, Self::Err> {
    match s {
      "prod" => Ok(Environment::PROD),
      "dev" => Ok(Environment::DEV),
      _ => Err("Unknown Environment Given".to_string()),
    }
  }
}

impl Default for Environment {
  fn default() -> Self {
    // Living on the edge with code like this, perhaps Dev
    // is the smarter way ;)
    Environment::PROD
  }
}
- A
ConfigStruct, to store all these key-values
#[derive(Debug, Clone)]
pub struct Config {
  api_key: String,
  emote_name: String,
  emote_users: Vec<String>,
  env: Environment,
}

impl Config {
  pub fn new(env: Environment) -> Result<Config, VarError> {
    Ok(Config {
      api_key: env::var("API_KEY")?,
      emote_name: env::var("EMOTE_NAME")?,
      emote_users: env::var("EMOTE_USERS")?
        .split(",")
        .map(|x| x.to_string())
        .collect(),
      env,
    })
  }
}
Which can then be read from our main function - alas we are one step closer to shrugging
fn main() {
  let env = std::env::args().nth(1).map_or(Environment::default(), |v| {
    Environment::from_str(&v).unwrap()
  });
  dotenv::from_filename(env.as_file()).ok();
  let config = Config::new(env).expect("Err parsing environment");
}
2. The Build Process
Building won't require any special Cargo.toml options, but it will require the help of the rust-musl-cross base Docker Image for compiling a binary that can run on the ARMv7 Architecture of the Pi. The general approach I take here is:
- Use a Multi-stage build
- Cache dependencies in the first step, so they only re-download on change
- Compile the application in the next step, using whatever build dependencies I need (eg
rust-musl-cross, or maybe your favjdkif that's your poison) - Copy the final artifact into an optimized run container (eg
Alpine Linux, or your favjreif you're still sipping that)
####################
# 0. Download dependencies (this step gets skipped on subsequent builds thanks to Caching!)
####################
FROM messense/rust-musl-cross:armv7-musleabihf as builder
RUN USER=root cargo new --bin cache_build
WORKDIR ./cache_build
COPY ./Cargo.toml ./Cargo.toml
COPY ./Cargo.lock ./Cargo.lock
RUN cargo build --target=armv7-unknown-linux-musleabihf --release
RUN rm src/*.rs

####################
# 1. Build
####################
ADD ./src ./src
ADD *.env ./
RUN rm target/armv7-unknown-linux-musleabihf/release/deps/disbot*
RUN cargo build ---target=armv7-unknown-linux-musleabihf --release

###################
# 2. Run
###################
FROM alpine:latest
COPY --from=builder /home/rust/src/cache_build/target/armv7-unknown-linux-musleabihf/release/disbot /app
COPY --from=builder /home/rust/src/cache_build/prod.env /prod.env
ENTRYPOINT ["/app"]
3. The Deploy Process
The Shiba () may not Shruggeth () without a Deployment. Docker Compose is relatively straight forward, the only special piece of the puzzle is the restart policy: I wanted the bot to restart should the container crash (for whatever reason ).
version: "3.8"
services:
  disbot:
    container_name: disbot
    build:
      context: .
      dockerfile: ./docker/disbot/Dockerfile
    image: disbot:latest
    deploy:
      restart_policy:
        condition: on-failure
The only thing left to do is getting the image itself to the Pi. I'm not a fan of developing on the Pi, nor publishing images to some Docker Repository. Instead, I'll just tar the image and throw it onto the Pi manually. The only requirement is ssh access to the Pi locally -- something I've already done in my aforementioned setup . Using this, Docker-Compose will upgrade the running instances to new image versions as they get deployed
docker-compose build disbot
docker save -o disbot.tar disbot:latest
ssh $USER@raspberrypi 'mkdir -p ~/deploy'
scp disbot.tar $USER@raspberrypi:~/deploy/
scp docker-compose.yaml $USER@raspberrypi:~/deploy/
scp prod.env $USER@raspberrypi:~/deploy/
rm disbot.tar
ssh $USER@raspberrypi 'cd ~/deploy && docker load -i disbot.tar && docker-compose up -d && docker image prune -fa'
(To prevent old images cluttering the Pi's disk, docker image prune -fa can help)
The Entrypoint
Serenity is a pretty slick library, making it easy to register our bot with the right set of intentions. The actual main.rs isn't much longer than what we got a glimpse of earlier. After the config is parsed, we need a Client (stating what we intend to do) and with an event_handler (to actually execute). The most notable addition is registering an Async framework - in this case Tokio.
#[tokio::main]
async fn main() {
  // ... Config/Env Parsing
  let mut client = Client::builder(&config.get_api_key())
    .intents(
      GatewayIntents::GUILDS
        | GatewayIntents::GUILD_EMOJIS
        | GatewayIntents::GUILD_MESSAGES
        | GatewayIntents::GUILD_MESSAGE_REACTIONS,
    )
    .event_handler(Handler::new(config.clone()))
    .await
    .expect("Err creating client");

  if let Err(why) = client.start().await {
    println!("Client error: {:?}", why);
  }
}
The real crux of the problem, then, lies in two implementation details:
- Pulling the custom emoji we want to react with and caching it (so we don't need an API fetch every time the bot triggers)
- Setting up the event handler to listen for the right time to act.
Creating an Emoji Cache
Since this is pretty well defined unit of behavior, I decided to break out a module for it: emoji.rs which will house our EmojiLookup struct. In here:
- I want to fetch this cache easily, from anywhere
- I want this cache to be thread-safe
- And I want the cache capable of populating itself
With these needs in mind, I turned to lazy_static! to help setup that global instance. This little macro makes it simple to create static references, which can be made thread safe using the proper synchronization primitives (eg RwLock, etc). Rather than store an entire EmojiLookup struct, though, I decided to only store the configuration values needed to rebuild the struct. Internally, Serenity-rs handle caching of API calls so we don't actually need to re-cache these values ourselves (how nifty), so I'm dancing around the requirement a little (oh well ).
lazy_static! {
  static ref EMOJI_TO_FIND: RwLock<String> = RwLock::new("".to_string());
}

pub struct EmojiLookup {}

pub fn configure(config: &Config) -> Result<(), String> {
  let mut inst = INSTANCE
    .try_write()
    .map_err(|_| "Failed to get lock on emoji instance")?;
  *inst = config.get_emote_name().to_string();
  Ok(())
}

impl EmojiLookup {
  pub fn inst() -> Self {
    EmojiLookup {}
  }
}
With the above, we can now setup the EmojiLookup once on application start and obtain a usable handle to it at any point we desire.
mod emoji;

async fn main() {
  // ... config and env parsing
  emoji::configure(&config).expect("Failed to setup emoji lookup");
  // ... client setup
}
When it comes to actually finding the emoji itself, we'll just do a simple search over the Guild's stored emotes (noting that this only works for custom emojis -- baked in emotes you'll just need to use the hardcoded unicode representation of them ).
impl EmojiLookup {
  pub async fn get(&self, guild_id: GuildId, cache: &Cache) -> Result<Emoji, String> {
    // Pull the emoji from the guild attached to the message
    let maybe_emoji = cache
      .guild_field(guild_id, |guild| guild.emojis.clone())
      .await
      .ok_or("Failed to pull emojis for Guild".to_string())?;

    // Obtain a read lock and find the emoji of matching name
    let emoji = match INSTANCE.try_read() {
      Ok(e) => maybe_emoji
        .iter()
        .find_map(
          |(_, emoji)| {
            if emoji.name == *e {
              Some(emoji)
            } else {
              None
            }
          },
        )
        .ok_or("Server does not have expected Emoji".to_string())?,
      Err(_) => return Err("Failed to get read on Emoji".to_string()),
    };
    Ok(emoji.clone())
  }
}
At last, we're finally able to enact the full wrath of the shrug!
Defining an Event Handler
As another unit of logic, I broke this into a Handler struct inside handler.rs. For this, the only special piece is needing to satisfy the Trait EventHandler, which has a few "lifecycle" methods the bot can tie into. In this case, we only care to implement the message function, which is invoked when a message is sent in the Guild.
pub struct Handler {
  config: Config
}

#[async_trait]
impl EventHandler for Handler {
  async fn message(&self, ctx: Context, msg: Message) {
    // TODO Enact your shrugging vengeance
  }
}
The general flow looks like this:
- Don't react if the message comes from yourself (otherwise we get all kinds of odd infinite loop-y behavior)
if msg.is_own(&ctx.cache).await {
  return;
}
- See if the message has any mentions of a configured user
let mentions_user = msg.mentions.iter().find(|user| {
  self
    .config
    .get_emote_users()
    .iter()
    .any(|cname| *cname.to_lowercase() == user.name.to_lowercase())
});
if mentions_user.is_none() {
  return;
}
- Fetch the emoji from our
EmojiLookup
let guild_id = match msg.guild_id {
  Some(id) => id,
  None => return,
};
let emoji = EmojiLookup::inst().get(guild_id, &ctx.cache).await;
- React to the message & Reply with your distaste
let react = msg.react(
  &ctx.http,
  ReactionType::Custom {
    animated: emoji.animated,
    id: emoji.id,
    name: Some(emoji.name.to_string()),
  },
);
let message = msg.channel_id.say(&ctx.http, format!("{}", emoji));
tokio::try_join!(react, message)
  .map(|_| ())
  .map_err(|_| "Failed to react/Send".to_string())
Which in sum is captured here (structured slightly differently, but you'll get the point).
Unleash the Shiba
... Well, it is mostly useless . If anything, hopefully this post has laid the groundwork for you to try out your own silly bot!